This blog provides a structured approach to setting up GitHub, tailored specifically for our collaborative projects. By standardizing our setup, we can enhance our workflows, ensure consistency across our datasets, and simplify the complexities involved in managing our extensive research data.
Step 1: Prepare your environment
To follow this tutorial, you must have a GitHub account and Rstudio installed in your system.
Additionally, confirm that GitHub is installed and properly configured on your workstation. Follow the steps on the official GitHub docs
Step 2: Fork the repository
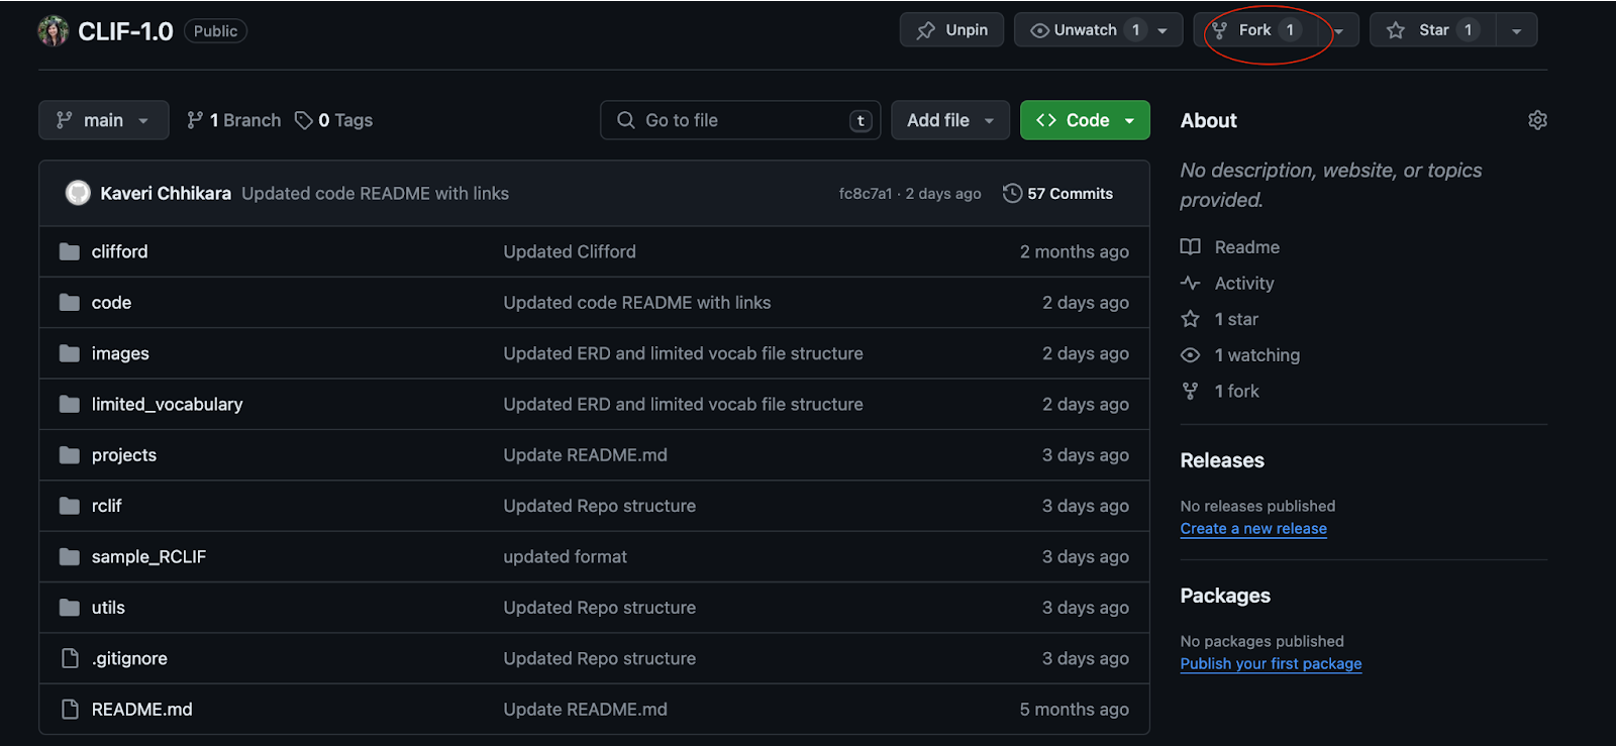
Navigate to the CLIF-1.0 GitHub repository and fork the repository. To fork a repository just means to make a copy that you are going to manage. When you fork a repository you can make changes without affecting the original repository.
Action:
- Click the fork button to create your personal copy of the repository.
- GitHub will create a copy of the repository under your GitHub account.
Step 3: Clone your forked repository
- Go to your GitHub account and navigate to the forked repository.
- Click the “Code” button and copy the URL (HTTPS or SSH recommended).
- Open a terminal (or Git Bash on Windows)
- Run the following command to clone the repository on your local machine. (Replace
your-usernamewith your GitHub username)git clone https://github.com/your-username/CLIF-1.0.git

Step 4: Open the repository in RStudio
Now that you have a local version of the repository on your machine, we can start working! Start by ensuring that Git is configured in Rstudio
Configure Git in RStudio
- Open RStudio: Launch RStudio on your computer
- Global Options: Go to
Tools->Global Options. - Git/SVN settings:
- In the left sidebar, click on
Git/SVN. - Ensure that the “Enable version control interface for RStudio projects” option is checked.
- Set the path to the Git executable. It is usually detected automatically, but if not, you can manually set the path:
- On Windows: It is usually
C:/Program Files/Git/bin/git.exeorC:/Program Files (x86)/Git/bin/git.exe. - On macOS: It is usually
/usr/local/bin/git. - On Linux: It is usually
/usr/bin/git.
- On Windows: It is usually
- Apply Changes: Click
Applyand then clickOKto save the settings.
Open CLIF repository with Git in RStudio
- Go to
File->New Project. - Select
Existing Directory. This should be the local instance of your forked repository. - Navigate to the directory of the cloned repository and click
Create Project.
Use the Git tab
Now you can easily interact with your forked remote repository and the local repository using the below options in RStudio.
- Commit Changes:
- Click on the Git tab.
- You will see a list of files that have been changed.
- Select the files you want to commit by checking the boxes next to them.
- Click Commit, enter a commit message, and click Commit again.
- Push Changes:
- After committing, click the Push button to send your changes to the remote repository.
- Pull Changes:
- Click the Pull button to fetch and merge changes from the remote repository into your local repository.
- Diff and History:
- Use the Diff button to see differences between the current version and the previous commit.
- Use the History button to view the commit history.
Step 5: Pull updates from the original repository
Add the Original Repository as a Remote:
- Open your project in RStudio.
- Go to the Terminal tab in RStudio (usually located at the bottom left).
- Add the original repository (upstream) as a remote:
git remote add upstream https://github.com/kaveriC/CLIF-1.0.git
Fetch Updates from the Original Repository:
- In the terminal, run
git fetch upstream
Merge Updates into Your Local Branch:
- Ensure you are on your main branch (or the branch you want to update):
git checkout main - Merge the changes from the upstream repository into your local branch:
git merge upstream/main - Resolve any merge conflicts if they occur.
Push the Updates to Your Fork:
- Push the merged changes to your forked repository:
git push origin main
Step 6: Create a Pull Request (PR)
After you commit and push your changes to your forked repository, you can create a pull request to merge these updates with the main original repository.
Using the GitHub Web Interface for Pull Requests
- Navigate to Your Forked Repository: Go to your forked repository on GitHub.
- Create a Pull Request:
- Click on the Pull Requests tab.
- Click the New Pull Request button.
- Select the base repository (original repository) and the branch you want to merge into (typically main).
- Select the head repository (your fork) and the branch with your changes.
- Click Create Pull Request.
- Add a title and description for your pull request, then click Create Pull Request.
Using RStudio for Pull Requests
While this step is typically done through the GitHub web interface, you can initiate it from the command line if needed.
- Open the terminal in RStudio and use the GitHub CLI (gh) to create a pull request:
gh pr create --base kaveriC:main --head your-username:main --title "Your PR Title" --body "Your PR Description" - Replace your-username with your GitHub username and customize the title and description as needed.